
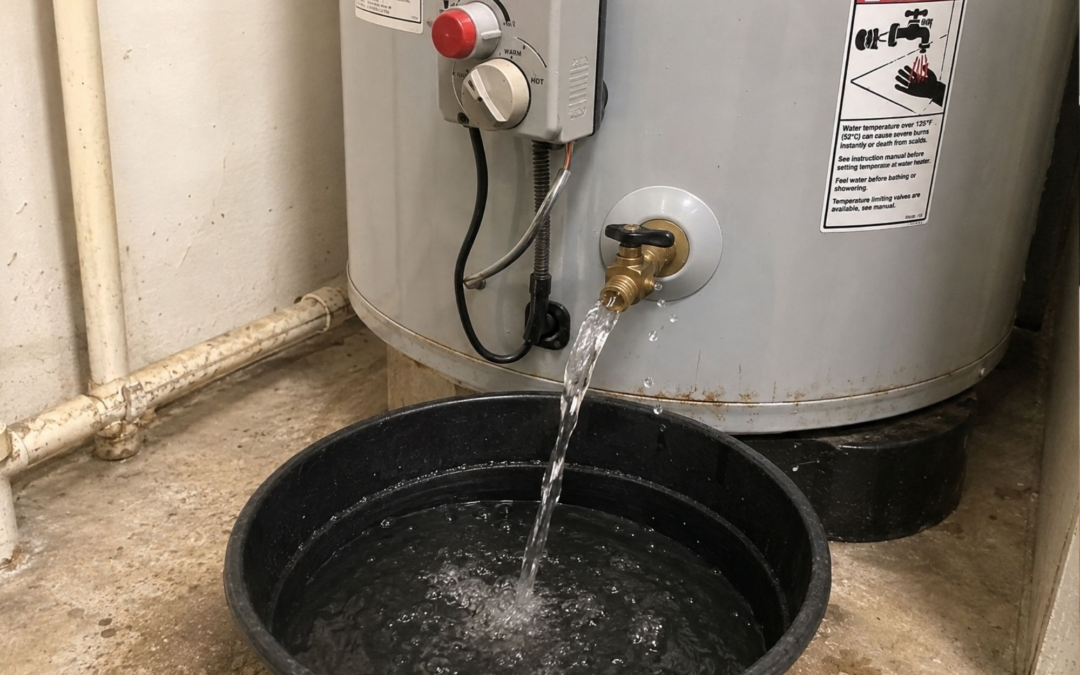
Knowing how to flush a water heater can help remove loose sediment that settles at the bottom of a storage tank. The basic job involves shutting off the heat source, controlling the water supply, draining the tank through a hose, flushing out sediment, refilling the tank, and restoring power or gas only after the tank is full.
For homeowners in Jefferson Valley, the bigger question is whether the heater is in good enough condition for a DIY flush. If the drain valve is clogged or leaking, the tank shows corrosion, or you are unsure about gas or electrical controls, having the water heater inspected by a licensed plumber may be the safer choice.
Why Should You Flush a Water Heater?
Flushing removes loose mineral deposits and debris that collect inside a tank water heater. Sediment can interfere with normal heating and may contribute to rumbling noises or reduced performance. The amount of buildup depends on the water supply, heater design, maintenance history, and how the system is used.
Hard water contains higher levels of dissolved minerals, which can increase sediment or scale formation. Homes with harder water may need more frequent maintenance, depending on the water heater and the manufacturer’s recommendations.
Flushing is maintenance, not a repair for a leaking tank, damaged component, or electrical or gas-control problem. If water-quality problems keep contributing to mineral buildup, water testing, treatment, softeners, and filtration may help identify or address issues with the home’s water supply.
What Should You Do Before Flushing a Water Heater?
Before starting, identify whether the heater is gas or electric, find the owner’s manual, and make sure you can safely shut down the heat source and cold water supply. You also need a safe discharge point because water from the tank may remain hot enough to cause burns.
Manufacturer instructions should take priority over a general online procedure because controls, shutdown steps, and maintenance requirements can differ by model.
For a typical tank-style heater, gather:
- A garden hose suitable for hot water
- Access to a floor drain or other safe discharge point
- A bucket and towels
- A flathead screwdriver if your drain valve requires one
- Gloves and eye protection
Do not start if the tank is actively leaking, badly corroded, or difficult to shut down. Those conditions call for inspection before routine flushing.
How to Flush a Water Heater Step by Step
A typical tank flush follows eight numbered steps: check the manual, shut off the heat source, close the cold water supply, attach a hose, drain the tank, flush out remaining sediment, refill the tank, and only then restore power or gas. Model-specific instructions always come first.
1. Read the Owner’s Manual
Confirm the heater type and locate the cold water inlet, drain valve, and shutdown controls. Do not assume that instructions for another brand or model apply to your unit.
2. Turn Off the Heat Source
For an electric water heater, switch off the correct circuit breaker or disconnect as directed by the manufacturer. For a gas water heater, follow the shutdown instructions on the unit or in the manual.
Turn off the heat source before flushing and, when possible, allow the water time to cool before draining to reduce the risk of scalding.
3. Close the Cold Water Supply
Shut the cold water valve that feeds the tank. Then open a hot water faucet in the home as directed by the manual. This helps relieve pressure and allows air into the system while the tank drains.
4. Attach a Garden Hose
Connect one end of the hose to the water heater’s drain valve near the bottom of the tank. Run the other end to a floor drain, exterior drain, or another location that can safely accept the water.
Keep people and pets away from the discharge point. Treat the water as hot unless you know it has cooled.
5. Open the Drain Valve
Open the drain valve carefully and let the tank drain. Watch the discharge for sediment. If the valve will not open or little to no water comes out, stop rather than forcing it. Sediment can clog the drain valve, and professional help may be needed when the tank cannot be flushed normally.
If flushing reveals a leaking valve or another plumbing problem, professional water heater repair and plumbing service may be appropriate.
6. Flush Out Remaining Sediment
After the tank has drained according to the manufacturer’s procedure, use the cold water supply as directed to move loose sediment toward the open drain. Continue until the discharge runs clear and you no longer see significant sediment.
Do not add vinegar, cleaners, compressed air, or other materials to a storage tank unless the manufacturer specifically instructs you to do so.
7. Close the Drain Valve and Refill the Tank
Close the drain valve, remove the hose, and reopen the cold water supply. Leave a hot water faucet open as directed so trapped air can escape while the tank refills.
Check the drain valve and nearby fittings for leaks before restarting the heater.
8. Restore Power or Gas After the Tank Is Full
Make sure the tank has completely refilled before restoring electricity. Follow the manufacturer’s startup instructions for your specific heater.
For a gas model, use the manufacturer’s restart or pilot-light procedure. Recheck the area for leaks after the heater returns to operation.
How Often Should You Flush a Water Heater?
For many tank water heaters, once a year is a common maintenance starting point, but the correct schedule depends on the manufacturer, model, water quality, and use. Hard water or heavy mineral content can make more frequent flushing appropriate. The owner’s manual should set the final maintenance interval.
If you prefer not to perform the work yourself, a licensed plumber can inspect the water heater and recommend appropriate service based on the unit’s condition and manufacturer requirements.
When Should You Call a Plumber Instead?
Call a plumber when the heater is leaking, heavily corroded, difficult to shut down, or unable to drain normally. Professional help is also appropriate when you are unsure about gas or electrical controls. Flushing should not require forcing a stuck valve, dismantling components, or guessing about a safe restart procedure.
A clogged drain valve is one of the clearest reasons to stop. Heavy sediment can block water from leaving the tank, so have the unit inspected if it cannot drain normally rather than forcing the valve or attempting to clear the blockage yourself.
An older heater that has gone years without maintenance also deserves more caution. There is no universal three-year cutoff that automatically determines whether a heater can be flushed. Its actual condition, drain valve, maintenance history, and manufacturer instructions matter more than the calendar.
Do Tankless Water Heaters Need the Same Flushing Process?
Tankless water heaters do not use the same storage-tank draining procedure. Many tankless models instead require periodic descaling or heat-exchanger flushing to remove mineral deposits. The equipment, cleaning solution, service valves, and sequence vary by model, so the manufacturer’s instructions are especially important.
Tankless maintenance is different from flushing a storage tank and may involve model-specific descaling or heat-exchanger maintenance. Work involving gas, burners, or electrical components may also require a licensed professional.
If your tankless unit lacks the required service setup or you are unsure how to isolate and descale it safely, have the unit evaluated by a qualified professional.
Keep Water Heater Maintenance Safe
Flushing a tank water heater can be a useful maintenance task when the unit is in sound condition, and the manufacturer recommends it. Follow the instructions for your specific model, control the hot-water hazard, refill the tank before restarting it, and stop when a clogged valve, leak, corrosion, or control issue makes the job uncertain.
Goldberg Plumbing & Heating has served Northern Westchester and Putnam Counties for more than 40 years. If you’re in Jefferson Valley and your water heater will not drain properly, shows signs of a plumbing problem, or you would rather have the system checked before flushing, contact us for a professional evaluation.
FAQs
Can I flush my hot water heater myself?
Many homeowners can flush a standard tank water heater if the unit is in good condition and they can follow the manufacturer’s shutdown, draining, refilling, and restart instructions safely. If the heater shows damage or the procedure is unclear, have it inspected by a licensed plumber.
Is 3 years too late to flush a water heater?
Three years is not an automatic cutoff. A heater that has gone that long without flushing may have accumulated sediment, but its condition, age, drain valve, and manufacturer guidance are more useful for deciding what to do next. If the heater is leaking, corroded, or will not drain normally, have it inspected before attempting a flush.
Is it worth flushing a hot water heater?
Flushing is worthwhile when the manufacturer includes it in the maintenance schedule because it removes loose sediment from the bottom of a storage tank. Sediment can interfere with normal heating performance. Flushing does not, however, fix a damaged tank, failed heating component, or leaking valve.
How do I know if my water heater needs to be flushed?
Rumbling or popping noises, visible sediment during draining, or changes in hot-water performance can occur when sediment builds up. These signs do not prove sediment is the only cause because several water-heater problems can produce similar symptoms. Check the maintenance schedule and have persistent problems diagnosed instead of relying on flushing alone.
How long should you flush a water heater?
There is no single number of minutes that applies to every tank. Follow the manufacturer’s procedure and watch the water leaving the hose. Continue the cold-water flush as directed until the water runs clear and significant loose sediment is no longer coming from the tank.