
A leaky faucet may seem like a small problem, but it can have significant consequences. A dripping faucet wastes more than just water. It also adds to your water bill. According to the Environmental Protection Agency (EPA), a faucet that drips once per second can waste over 3,000 gallons of water annually. That’s enough water to fill more than 40 bathtubs!
Ignoring a leaky compression faucet or other types of faucets can result in higher utility bills and long-term damage to your plumbing system. Whether you’re dealing with a slow drip or constant leaking water, fixing the issue promptly is essential. Not only does it save water, but it also prevents potential damage to your sink, countertop, or plumbing.
Common Causes of a Leaky Faucet
A leaky faucet can be caused by several factors, depending on the type of faucet you have. Here are the most common reasons for leaks:
Worn-Out Washers
In compression faucets, the rubber washer is responsible for creating a seal that stops the water flow. Over time, the washer wears out, causing water to leak around the spout. This is one of the most leaky compression faucets problems. Replacing a worn-out washer is usually a quick and inexpensive fix.
Damaged O-Rings
Another common issue is a damaged O-ring, especially in single-handle faucets. The O-ring sits around the faucet handle and seals the faucet to prevent leaks. When this seal breaks down, you may notice water leaking around the handle. Replacing the O-ring or tightening the packing nut can stop the leak.
Faulty Cartridges
For cartridge faucets, a worn or broken cartridge is often the culprit. Cartridges control the water flow and can become clogged with debris or minerals. If the cartridge is damaged, replacing it with a new one should fix the leak. Ensure that the cartridge straight replacement is compatible with your faucet brand.
Corroded Valve Seat
The valve seat connects the faucet to the spout. In older faucets or those with hard water, mineral buildup can cause the valve seat to corrode. This corrosion leads to leaks around the spout. If the corrosion is severe, you may need to replace the valve seat or the entire faucet.
Water Pressure Issues
Sometimes, a dripping faucet can be caused by excessive water pressure. High pressure forces water past the seals in your faucet, leading to leaks. If you notice leaks during times of low water usage, such as at night, check the water supply valves and adjust the pressure.
Tools and Materials Needed for Faucet Repair
Before you start your faucet repairs, gather the necessary tools and replacement parts. Having everything ready will save you time and frustration. Here’s a list of the necessary tools for the job:
- Crescent wrench – To loosen and tighten nuts without damaging faucet components.
- Screwdriver set – For removing screws and decorative parts like the decorative cap.
- Replacement parts – Such as seat washers, cartridges, O-rings, and rubber seats.
- Plumber’s tape – To seal threaded parts and prevent leaks.
- Silicone grease – To lubricate parts and reduce wear.
- Towel – To cover the drain and catch any small parts that might fall into the sink.
These tools are critical for a successful repair. If you’re missing a tool, it’s best to grab it before you begin.
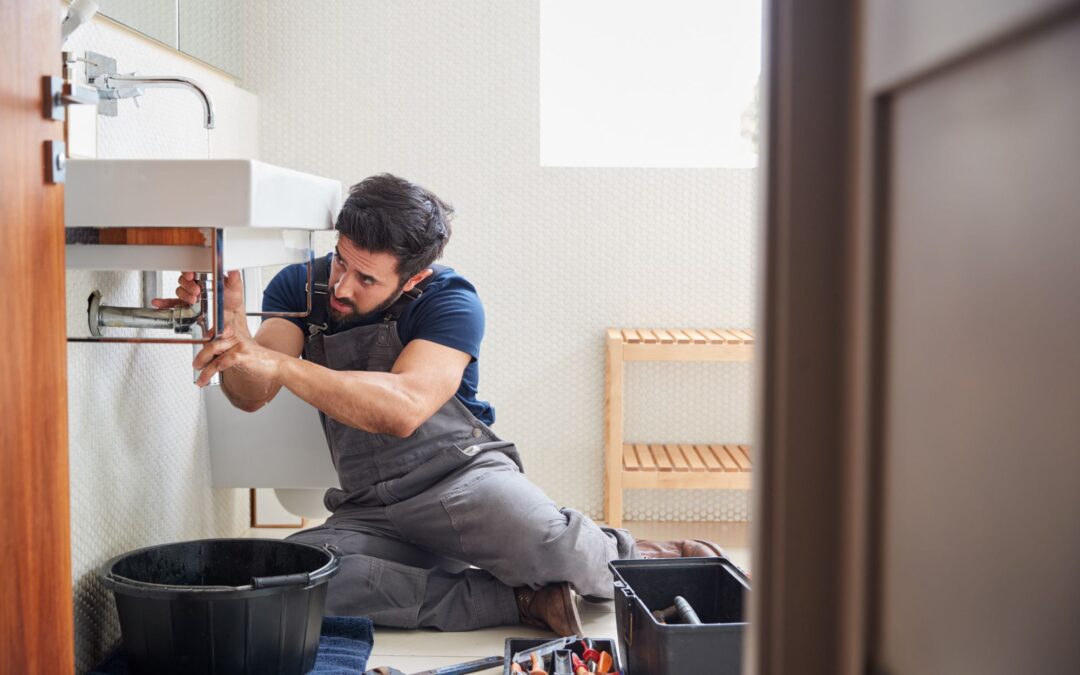
Step-by-Step Guide to Faucet Repair
Follow these steps to repair your leaky faucet. Whether you’re fixing a compression faucet, cartridge faucet, or another type, these steps will guide you through the process.
Step 1 – Identify Your Faucet Type
Before starting, you need to know which type of faucet you’re dealing with. There are compression faucets, cartridge faucets, ball faucets, and ceramic disk faucets. Identifying the faucet type is crucial because each one has different components and repair methods.
Check the handle or spout for any markings, or refer to your faucet’s manual. If you’re unsure, the faucet’s style can often help you determine its type.
Step 2 – Shut Off the Water Supply
Locate the water supply valves under the sink and turn them clockwise to shut them off. After you’ve shut off the water, open the faucet to release any water left in the lines. This will ensure that no water flows while you’re repairing the faucet.
Step 3 – Disassemble the Faucet
Remove the decorative cap to reveal the handle screw. Unscrew the handle and pull it off. If the handle is stuck, you may need a special tool to help remove it. Keep track of all the small parts, as they will be needed for reassembly.
Step 4 – Inspect and Replace Damaged Parts
Once you have access to the internal parts, inspect each one for wear. The seat washer, cartridge, and O-ring are the most common parts to fail.
If you have a compression faucet, inspect the seat washer and replace it if it’s worn. For cartridge faucets, remove the entire cartridge and replace it with a new one. Don’t forget to lubricate the rubber seats and O-ring with silicone grease.
Step 5 – Reassemble and Test
After replacing the damaged parts, carefully reassemble the faucet. Hand-tighten each connection, but avoid overtightening, which can damage the components. Once everything is put back together, turn the water supply valves back on and test the faucet. If you see any leaks, make adjustments to ensure the seals are properly aligned.
Cost of Faucet Repair
Here’s a quick cost comparison for leaky faucet repair:
| Repair Option | Average Cost | Pros | Cons |
|---|---|---|---|
| DIY (parts only) | $5 – $25 | Low cost, quick fix | Requires tools & skills |
| Professional repair | $75 – $150 | Guaranteed work, fast | Higher cost |
DIY repairs are a cost-effective option for most minor leaks, such as replacing seat washers or O-rings. However, if the damage is extensive or you lack the tools, hiring a plumber is a good choice for a professional and lasting fix.
Preventing Future Faucet Leaks
Once your faucet repairs are complete, maintaining your faucet is key to avoiding future issues. Here are some tips to help keep your faucet in good working condition:
- Clean the faucet aerator regularly to prevent mineral buildup, especially in areas with hard water.
- Replace seals and washers at the first sign of wear to prevent future leaks.
- Avoid excessive force when turning the faucet handle; this reduces wear on internal parts.
- Install a water softener if you have hard water to protect faucet components from mineral damage.
Regular maintenance can extend the life of your faucet and prevent leaks down the line.
Environmental & Financial Benefits of Quick Repairs
Fixing a leaking water faucet not only helps conserve water, but it can also lower your utility bills. A dripping faucet wastes a significant amount of water, and every drop adds to your water bill. According to the EPA, even a leaky compression faucet can waste hundreds of gallons annually. By addressing the problem promptly, you save both water and money.
Additionally, preventing leaks helps protect your plumbing and home from water damage, saving you even more in the long run.
When to Call a Professional Plumber
While most faucet repairs can be done at home, there are certain situations where it’s best to call a professional:
- If your faucet is older and parts are hard to find.
- If multiple components are worn and need replacing.
- If the leak persists after replacing the washer or cartridge.
A plumber can provide a thorough inspection and ensure that the repair is done correctly, saving you time and money in the future.
Conclusion
A dripping faucet may seem like a small problem, but it’s one that can lead to water wastage, higher utility bills, and plumbing damage if not addressed quickly. By following these steps to repair your faucet, you’ll save money, reduce water waste, and extend the lifespan of your plumbing. Whether you opt for a quick fix or call in a plumber, prompt repairs are the key to maintaining a healthy plumbing system in your home.
At Goldberg Plumbing, we help homeowners across Westchester and Putnam counties maintain their plumbing. From fixing leaks to inspecting your system, our licensed plumbers offer reliable, long-term solutions. Contact us today to schedule your service and keep your plumbing in top condition.
FAQs
How do I stop a faucet from leaking?
To stop a faucet from leaking, turn off the water supply, disassemble the faucet, and check for damaged components like the washer, O-ring, or cartridge. Replace any damaged parts and reassemble the faucet.
What is the most common cause of a leaky faucet?
The most common cause of a leaky faucet is a worn washer or cartridge, particularly in compression faucets. This wear allows water to leak through, making replacement an easy fix.
What does it mean when a faucet is dripping?
A dripping faucet typically means the internal seals or components, such as the O-ring or seat washer, are worn or damaged, allowing water to leak out even when the faucet is off.
How to fix a faucet stem leak?
To fix a faucet stem leak, remove the packing nut, replace the O-ring, and ensure the valve stem is seated properly. Tighten the packing nut securely to prevent the leak from returning